How To Screen Capture Android App Code Programmatically
Generally we are taking screenshots in android devices by pressing power + volume down button. Now arises a question that is it possible to take screenshot programmatically from android app? Yes, it is possible to capture screenshot within our android app programmatically. In this tutorial, you will learn how to take screenshot programmatically of an activity or a view.
Let's Get it Working
In this tutorial, we are going to learn how to take screenshot programmatically in android and store it in storage as well. To really understand the process we will create an app. The App contains a simple view having buttons to capture screenshot and save it in storage, image view to show screenshots. I assume that you have already created a new android project. Source Code is available on GitHub.


Step 1) Update strings.xml.
Add the below string values to the string.xml located in res ⇒ values ⇒ strings.xml.
<resources> <string name="app_name">Screenshot</string> <string name="take_screen_shot_activity">Activity Screenshot</string> <string name="take_screen_shot_view">Layout Screenshot</string> <string name="take_save_screen_shot">Save Screenshot</string> <string name="reset">Reset</string> <string name="toast_message_screenshot">First Take any Screenshot</string> <string name="toast_message_screenshot_success">Screenshot saved successfully.</string> <string name="settings_message">Go to Permissions to Grant Storage</string> </resources>
Step 2) update activity_main.xml.
Now update the layout file for the MainActivity.java i.e activity_man.xml and add the below code in your layout file. The code will create four buttons and a image view.
<?xml version="1.0" encoding="utf-8"?> <LinearLayout xmlns:android="http://schemas.android.com/apk/res/android" xmlns:tools="http://schemas.android.com/tools" android:id="@+id/parentView" android:layout_width="match_parent" android:layout_height="match_parent" android:gravity="center_horizontal" android:orientation="vertical" android:padding="16dp" tools:context=".MainActivity"> <LinearLayout android:layout_width="match_parent" android:layout_height="wrap_content" android:orientation="horizontal"> <Button android:id="@+id/buttonScreenshotActivity" android:layout_width="match_parent" android:layout_height="wrap_content" android:layout_weight="1" android:text="@string/take_screen_shot_activity" android:textAllCaps="false" android:textColor="@color/colorPrimaryDark" /> <Button android:id="@+id/buttonScreenshotView" android:layout_width="match_parent" android:layout_height="wrap_content" android:layout_weight="1" android:text="@string/take_screen_shot_view" android:textAllCaps="false" android:textColor="@color/colorPrimaryDark" /> </LinearLayout> <LinearLayout android:layout_width="match_parent" android:layout_height="wrap_content" android:orientation="horizontal"> <Button android:id="@+id/buttonSaveScreenshot" android:layout_width="match_parent" android:layout_height="wrap_content" android:layout_weight="1" android:text="@string/take_save_screen_shot" android:textAllCaps="false" android:textColor="@color/colorAccent" /> <Button android:id="@+id/buttonReset" android:layout_width="match_parent" android:layout_height="wrap_content" android:layout_weight="1" android:text="@string/reset" android:textAllCaps="false" android:textColor="@color/colorAccent" /> </LinearLayout> <ImageView android:id="@+id/imageViewShowScreenshot" android:layout_width="wrap_content" android:layout_height="wrap_content" android:layout_marginTop="10dp" /> </LinearLayout>
activity_main.xml would result a screen like this:
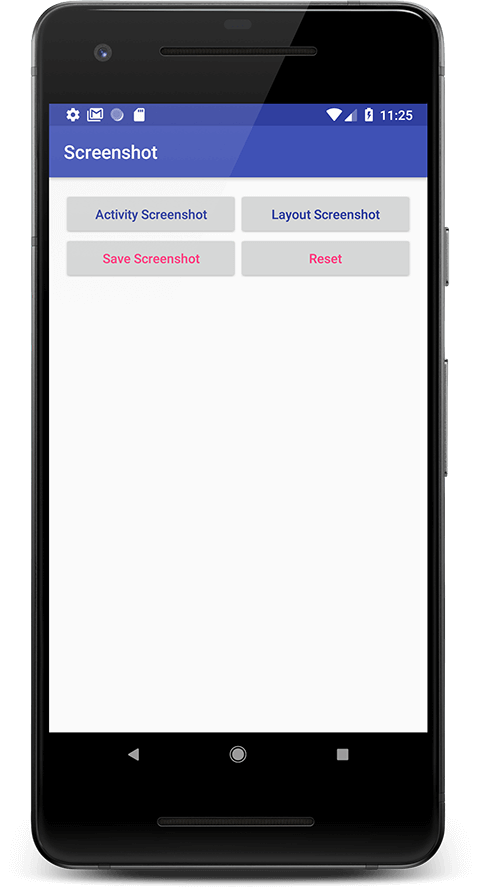
Main Screen
Step 3) Create ScreenshotUtil class.
Create a new package named helper and create ScreenshotUtil class and add below code in it. The code will create singleton class that is used to take screen shot. This ScreenshotUtil class contains following methods:-
Bitmap takeScreenshotForView(View view) :- Measures and takes a screenshot of the provided view
Bitmap takeScreenshotForScreen(Activity activity) :- Measures and takes a screenshot of the provided activity
package com.androidtutorialshub.helper; import android.app.Activity; import android.graphics.Bitmap; import android.view.View; import android.view.View.MeasureSpec; public class ScreenshotUtil { private static ScreenshotUtil mInstance; private ScreenshotUtil() { } public static ScreenshotUtil getInstance() { if (mInstance == null) { synchronized (ScreenshotUtil.class) { if (mInstance == null) { mInstance = new ScreenshotUtil(); } } } return mInstance; } /** * Measures and takes a screenshot of the provided {@link View}. * * @param view The view of which the screenshot is taken * @return A {@link Bitmap} for the taken screenshot. */ public Bitmap takeScreenshotForView(View view) { view.measure(MeasureSpec.makeMeasureSpec(view.getWidth(), MeasureSpec.EXACTLY), MeasureSpec.makeMeasureSpec(view.getHeight(), MeasureSpec.EXACTLY)); view.layout((int) view.getX(), (int) view.getY(), (int) view.getX() + view.getMeasuredWidth(), (int) view.getY() + view.getMeasuredHeight()); view.setDrawingCacheEnabled(true); view.buildDrawingCache(true); Bitmap bitmap = Bitmap.createBitmap(view.getDrawingCache()); view.setDrawingCacheEnabled(false); return bitmap; } public Bitmap takeScreenshotForScreen(Activity activity) { return takeScreenshotForView(activity.getWindow().getDecorView().getRootView()); } } Step 4) Create FileUtil class.
Create a new package named helper and create FileUtil class and add below code in it. The code will create singleton class that is used to save screen shot to storage. This FileUtil class contains following method:-
void storeBitmap(Bitmap bitmap, String filePath) :- Stores the given Bitmap to a path on the device.
package com.androidtutorialshub.helper; import android.graphics.Bitmap; import java.io.File; import java.io.FileNotFoundException; import java.io.FileOutputStream; import java.io.IOException; import java.io.OutputStream; public class FileUtil { private static FileUtil mInstance; private FileUtil() { } public static FileUtil getInstance() { if (mInstance == null) { synchronized (FileUtil.class) { if (mInstance == null) { mInstance = new FileUtil(); } } } return mInstance; } /** * Stores the given {@link Bitmap} to a path on the device. * * @param bitmap The {@link Bitmap} that needs to be stored * @param filePath The path in which the bitmap is going to be stored. */ public void storeBitmap(Bitmap bitmap, String filePath) { File imageFile = new File(filePath); imageFile.getParentFile().mkdirs(); try { OutputStream fout = new FileOutputStream(imageFile); bitmap.compress(Bitmap.CompressFormat.JPEG, 90, fout); fout.flush(); fout.close(); } catch (FileNotFoundException e) { e.printStackTrace(); } catch (IOException e) { e.printStackTrace(); } } } Step 5) Update build.gradle file.
To manage run time permission I have used Dexter Android library that simplifies the process of requesting permissions at runtime. you need to add the following compile line to your Gradle dependencies block in your build.gradle file and rebuilt the project.
dependencies { ... implementation 'com.karumi:dexter:5.0.0' } Step 6) Update MainActivity class.
Open class named MainActivity and add below code. Here I have written the code to initialize the views, registered the button's onClick listeners, also written the logic to take screenshot programmatically and save it to storage.
package com.androidtutorialshub.screenshot; import android.Manifest; import android.graphics.Bitmap; import android.os.Bundle; import android.os.Environment; import android.support.v7.app.AppCompatActivity; import android.view.View; import android.widget.Button; import android.widget.ImageView; import android.widget.LinearLayout; import android.widget.Toast; import com.androidtutorialshub.helper.FileUtil; import com.androidtutorialshub.helper.ScreenshotUtil; import com.karumi.dexter.Dexter; import com.karumi.dexter.PermissionToken; import com.karumi.dexter.listener.PermissionDeniedResponse; import com.karumi.dexter.listener.PermissionGrantedResponse; import com.karumi.dexter.listener.PermissionRequest; import com.karumi.dexter.listener.single.PermissionListener; public class MainActivity extends AppCompatActivity implements View.OnClickListener { private AppCompatActivity activity = MainActivity.this; private LinearLayout parentView; private Button buttonScreenshotActivity; private Button buttonScreenshotView; private Button buttonSaveScreenshot; private Button buttonReset; private ImageView imageViewShowScreenshot; private Bitmap bitmap; @Override protected void onCreate(Bundle savedInstanceState) { super.onCreate(savedInstanceState); setContentView(R.layout.activity_main); // initializing the views initViews(); // initializing the listeners initListeners(); } /** * method to initialize the views */ private void initViews() { parentView = findViewById(R.id.parentView); buttonScreenshotActivity = findViewById(R.id.buttonScreenshotActivity); buttonScreenshotView = findViewById(R.id.buttonScreenshotView); buttonSaveScreenshot = findViewById(R.id.buttonSaveScreenshot); buttonReset = findViewById(R.id.buttonReset); imageViewShowScreenshot = findViewById(R.id.imageViewShowScreenshot); } /** * method to initialize the listeners */ private void initListeners() { buttonScreenshotActivity.setOnClickListener(this); buttonScreenshotView.setOnClickListener(this); buttonSaveScreenshot.setOnClickListener(this); buttonReset.setOnClickListener(this); } /** * method for click listener * * @param view */ @Override public void onClick(View view) { switch (view.getId()) { case R.id.buttonScreenshotActivity: bitmap = ScreenshotUtil.getInstance().takeScreenshotForScreen(activity); // Take ScreenshotUtil for activity imageViewShowScreenshot.setImageBitmap(bitmap); break; case R.id.buttonScreenshotView: bitmap = ScreenshotUtil.getInstance().takeScreenshotForView(parentView); // Take ScreenshotUtil for any view imageViewShowScreenshot.setImageBitmap(bitmap); break; case R.id.buttonSaveScreenshot: requestPermissionAndSave(); break; case R.id.buttonReset: bitmap = null; imageViewShowScreenshot.setImageBitmap(bitmap); break; } } /** * Requesting storage permission * Once the permission granted, screenshot captured * On permanent denial show toast */ private void requestPermissionAndSave() { Dexter.withActivity(this) .withPermission(Manifest.permission.WRITE_EXTERNAL_STORAGE) .withListener(new PermissionListener() { @Override public void onPermissionGranted(PermissionGrantedResponse response) { if (bitmap != null) { String path = Environment.getExternalStorageDirectory().toString() + "/test.png"; FileUtil.getInstance().storeBitmap(bitmap, path); Toast.makeText(activity, getString(R.string.toast_message_screenshot_success) + " " + path, Toast.LENGTH_LONG).show(); } else { Toast.makeText(activity, getString(R.string.toast_message_screenshot), Toast.LENGTH_LONG).show(); } } @Override public void onPermissionDenied(PermissionDeniedResponse response) { // check for permanent denial of permission if (response.isPermanentlyDenied()) { Toast.makeText(activity, getString(R.string.settings_message), Toast.LENGTH_LONG).show(); } } @Override public void onPermissionRationaleShouldBeShown(PermissionRequest permission, PermissionToken token) { token.continuePermissionRequest(); } }).check(); } } Step 7) Run App
Run the app by clicking run button on Android Studio and you will see the UI mentioned above, click on any button to see the result.
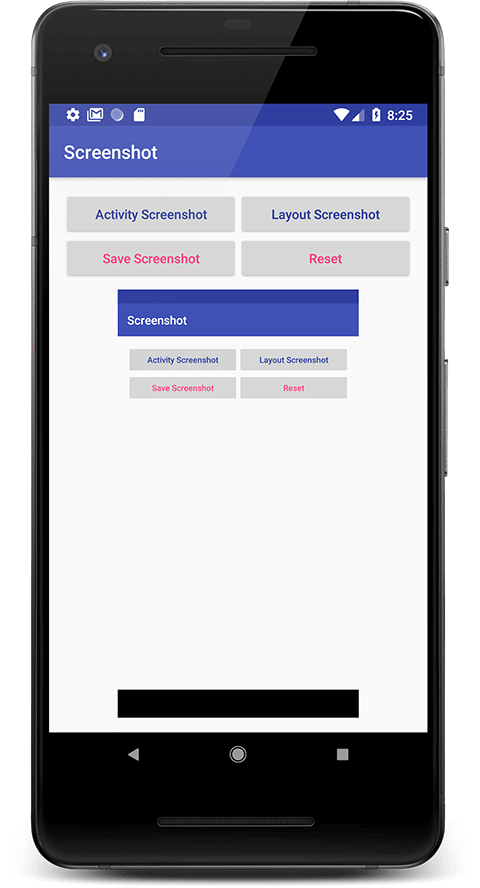
Activity Screenshot
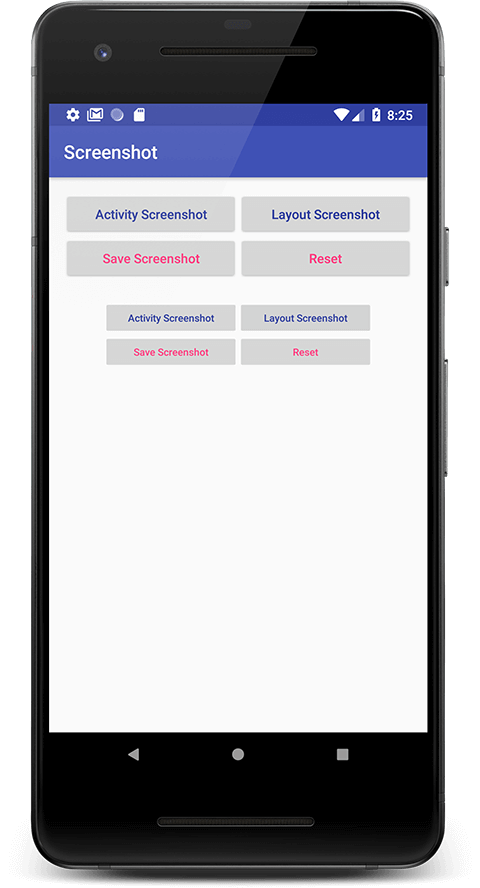
Layout Screenshot
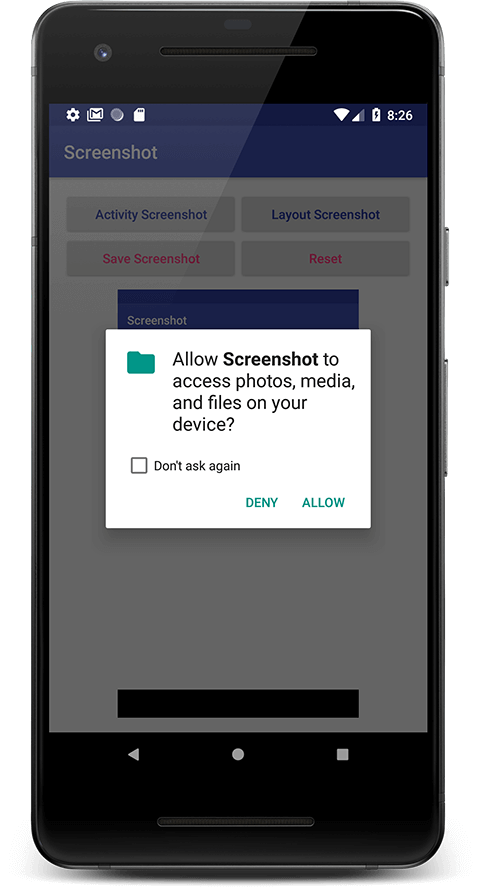
Run-time Permission
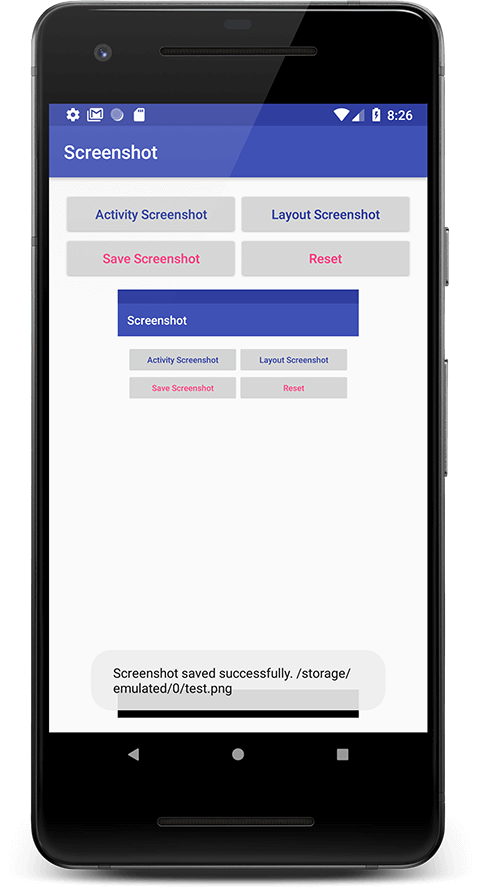
Save Screenshot


Please feel free to comment as well as ask questions. And, yeah! If this post helps you please do share!
Enjoy Coding and Share Knowledge
How To Screen Capture Android App Code Programmatically
Source: http://www.androidtutorialshub.com/android-take-screenshot-programmatically/
Posted by: garnerrodn1986.blogspot.com

0 Response to "How To Screen Capture Android App Code Programmatically"
Post a Comment